 Help Center
UOM (Unit of Measurement) allows you to define how products or services are quantified, priced, and taxed. Using this import function, you can efficiently upload multiple UOMs at once using a structured Excel template.To help you standardize and manage product pricing, quantity, tax, and discount details through predefined units of measurement.
Benefits :
-
Simplifies the management of pricing and measurement rules
-
Allows for fixed or flexible pricing per UOM
-
Supports bulk uploads of UOM data to save time and reduce errors
-
Ensures consistency across product/service configurations
With these benefits in mind, the following steps will guide you through the import process to ensure UOMs are added correctly and efficiently.
-
At the desktop site’s navigation bar, go to Import > UOM Import.
Import UOM(s) Here: https://system.caction.com/importuom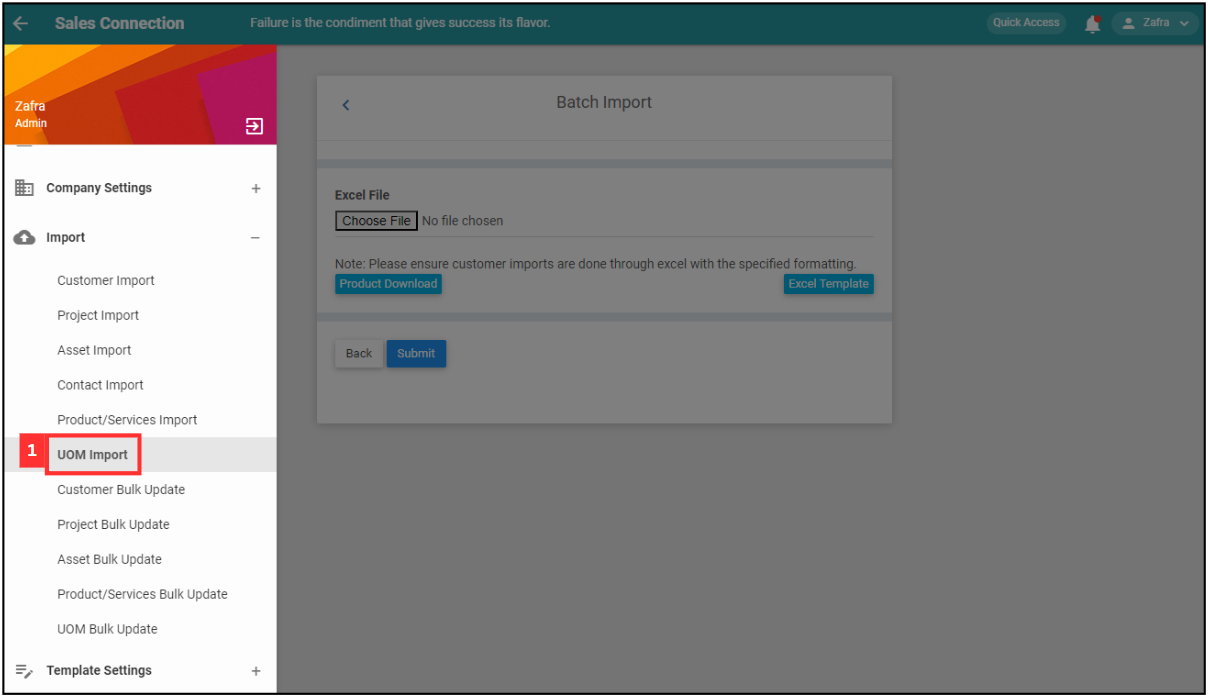
*Note: You must have access to Import menu to perform this action. Please request permission or help from your admin if you do not have access to the menu.
-
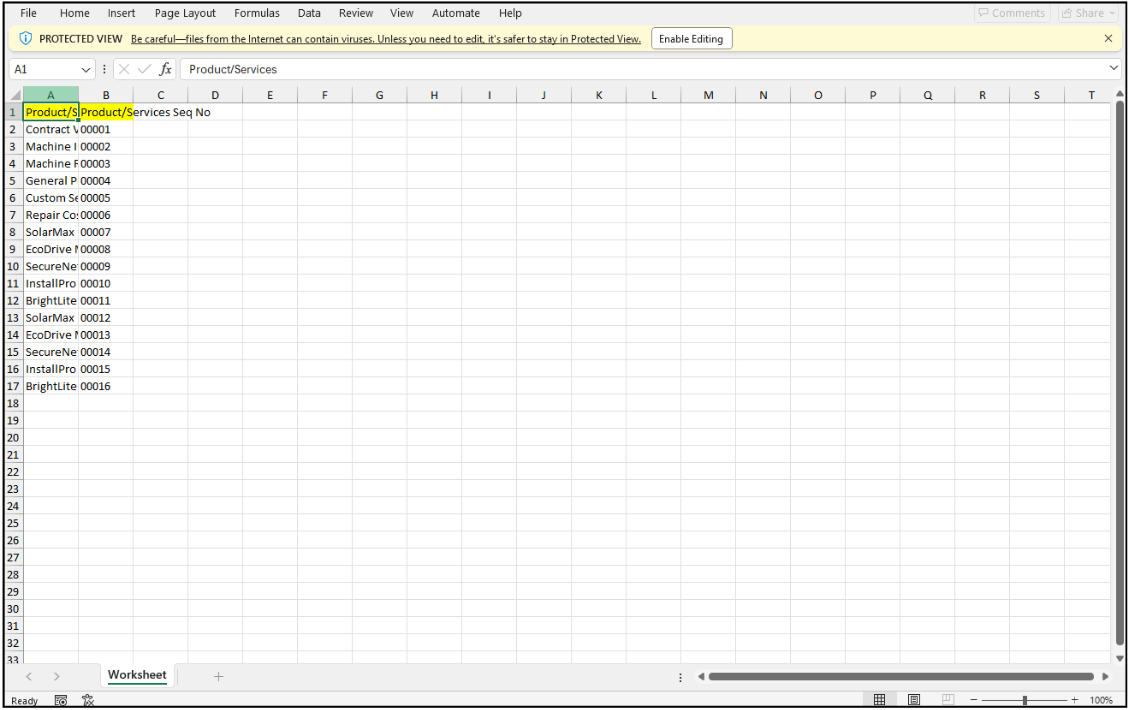
Download this file and refer to the product sequence number.
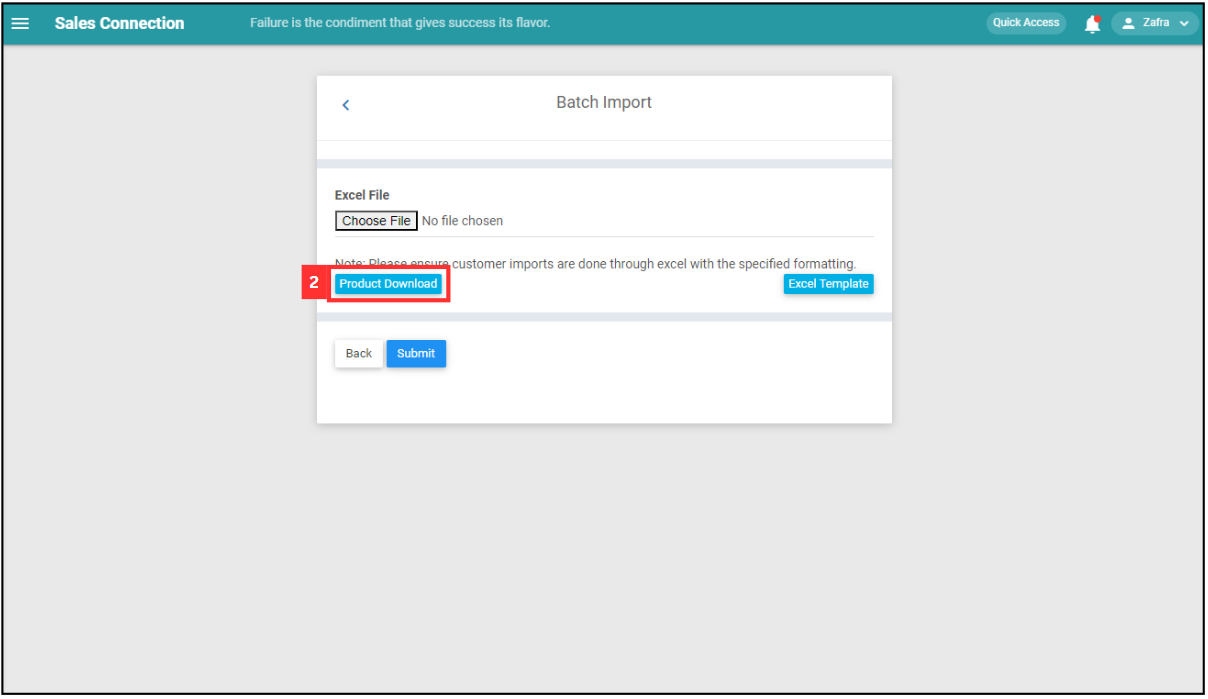
This is the sample of the product/services sequence number Excel file.
-
Click “Excel Template”.
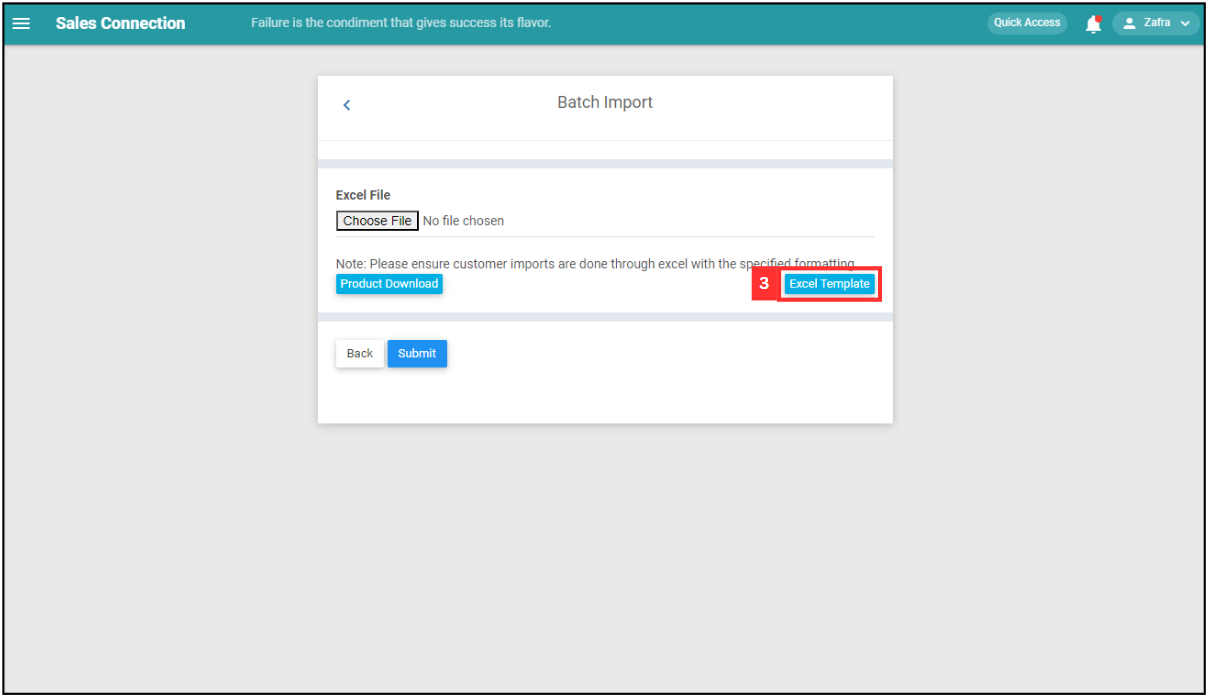
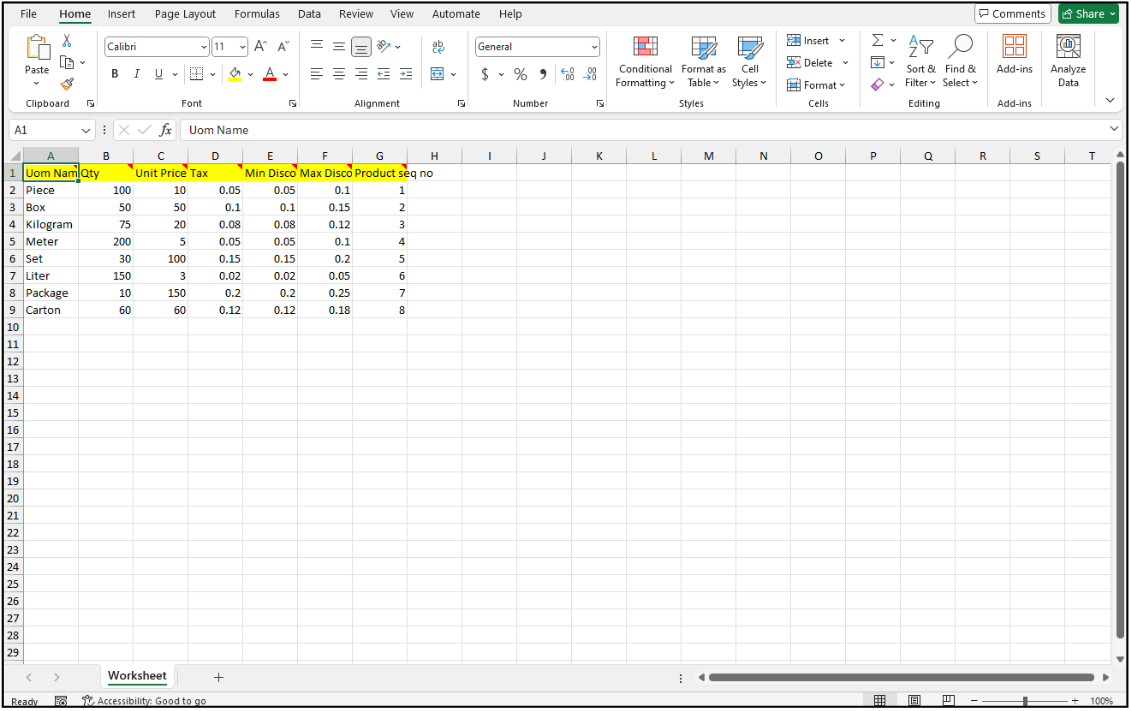
- Fill out the details of the new UOM.
a. The details include:
- UOM Name*
- Qty
- Unit Price (Specific number indicates a fixed price while unit price = “0” allows free pricing which can input any value later)
- Tax (Data is in range of 0-100 percentage)
- Min Discount (Data is in range of 0-100 percentage)
- Max Discount (Data is in range of 0-100 percentage)
- Product seq no*: Correspond to code from file in Step 2
*Note: Fields marked with an asterisk ( * ) are required.

-
Make sure all the information of the UOM is correct and save the file.
-
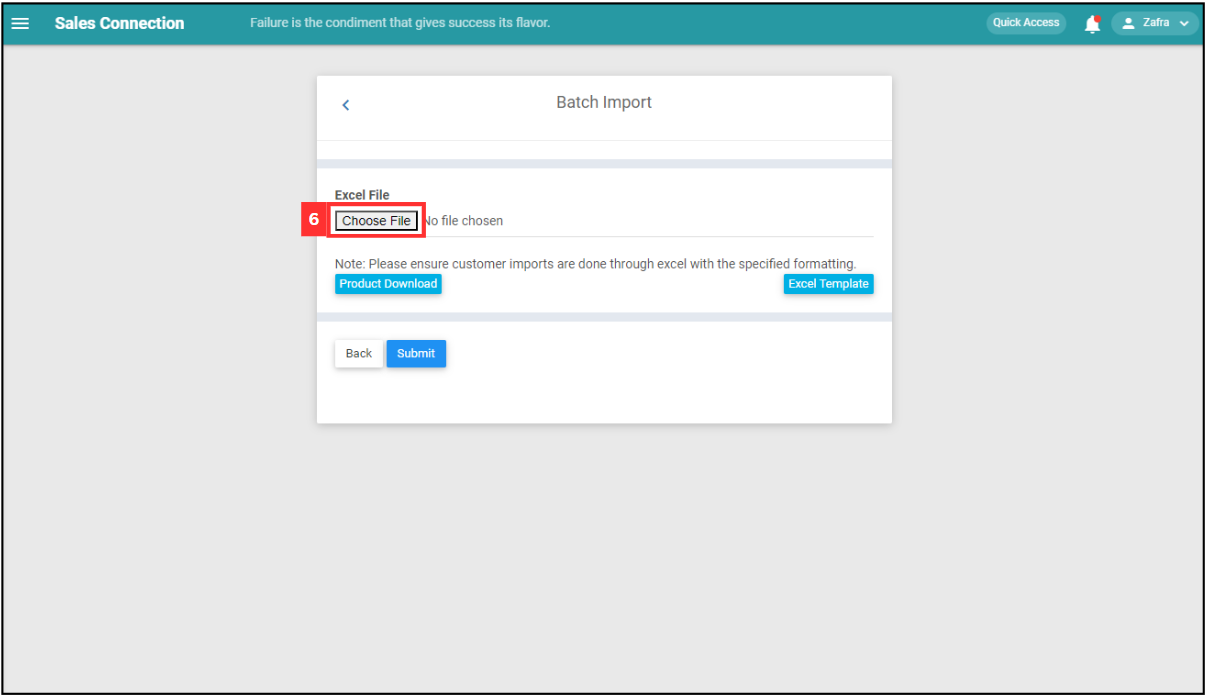
Go back to the UOM import page and choose the correct file by clicking “Choose File” to import.
-
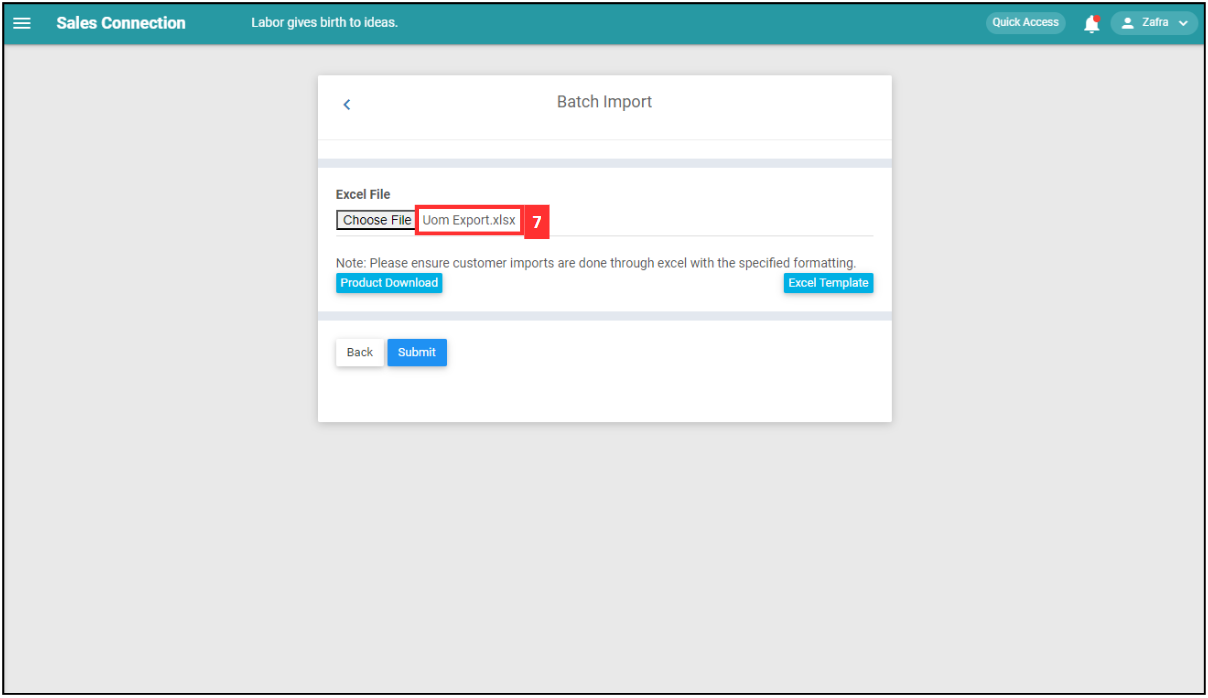
Make sure the file uploaded is correct.
-
Click on the “SUBMIT” button.
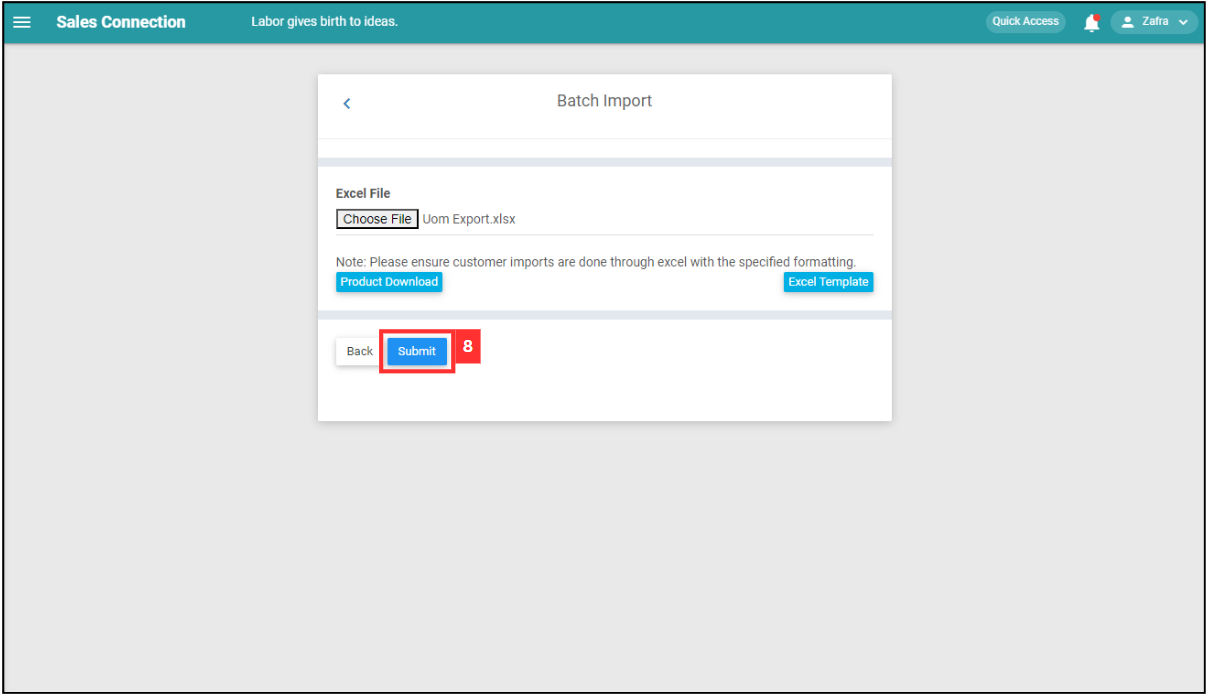
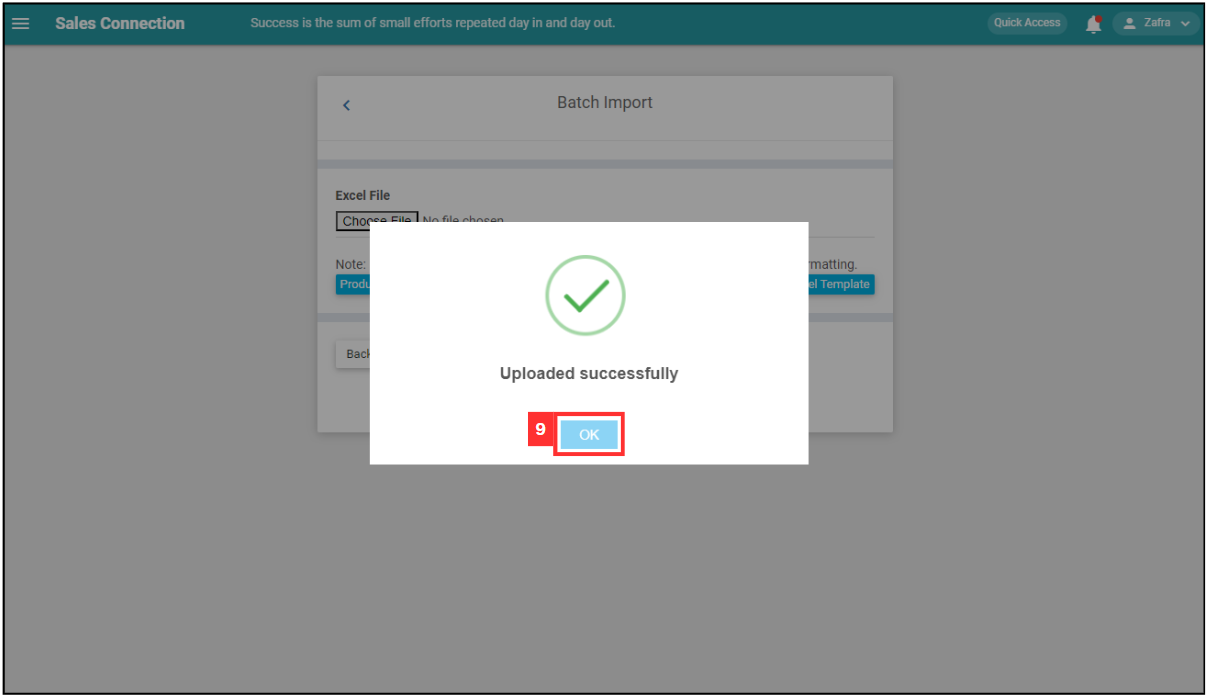
- Your items are successfully added when the “Uploaded successfully” prompt appears.
Related Articles