 Help Center
What is the purpose of adding Customer?
This page will guide you, step by step, on how to add a new customer into Caction.
Note: Depending on how your Caction system is set up, you might see "Customer" called something else, like "Site," "Outlet" or "Company."
From Customer List
-
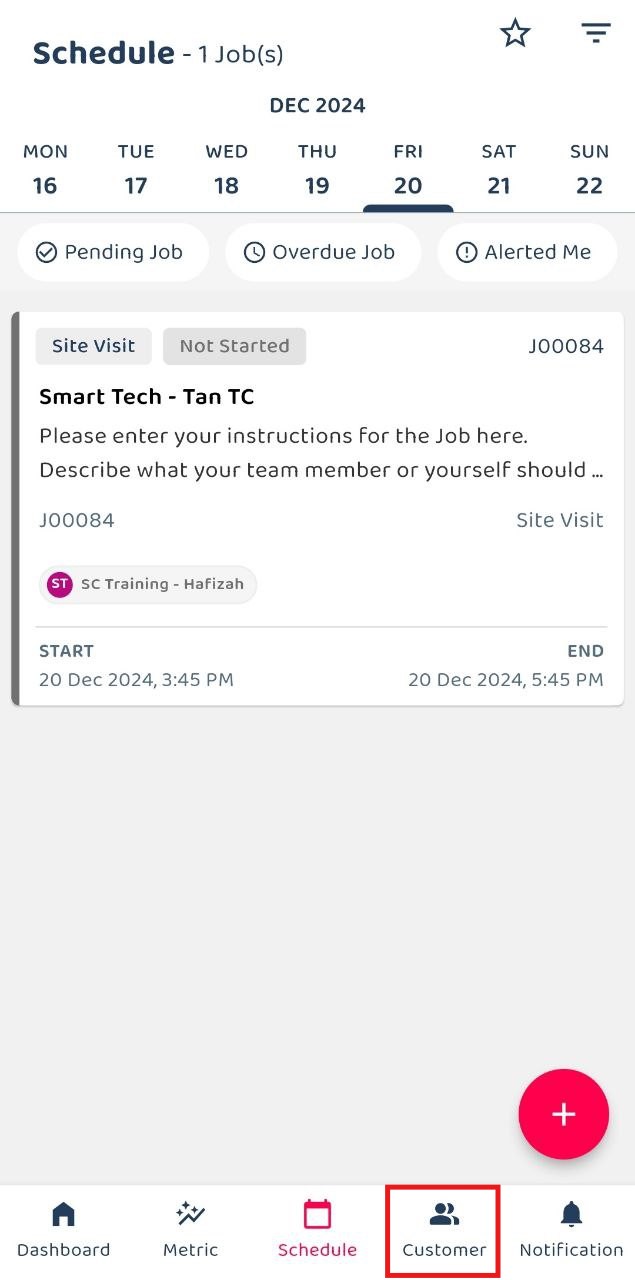
At the mobile app’s navigation bar, go to Customer.
-
Click on the “+” button to add new customer.
*Note: If you do not see the “+” button, you may need to request permission or help from your Admin to register new Customer.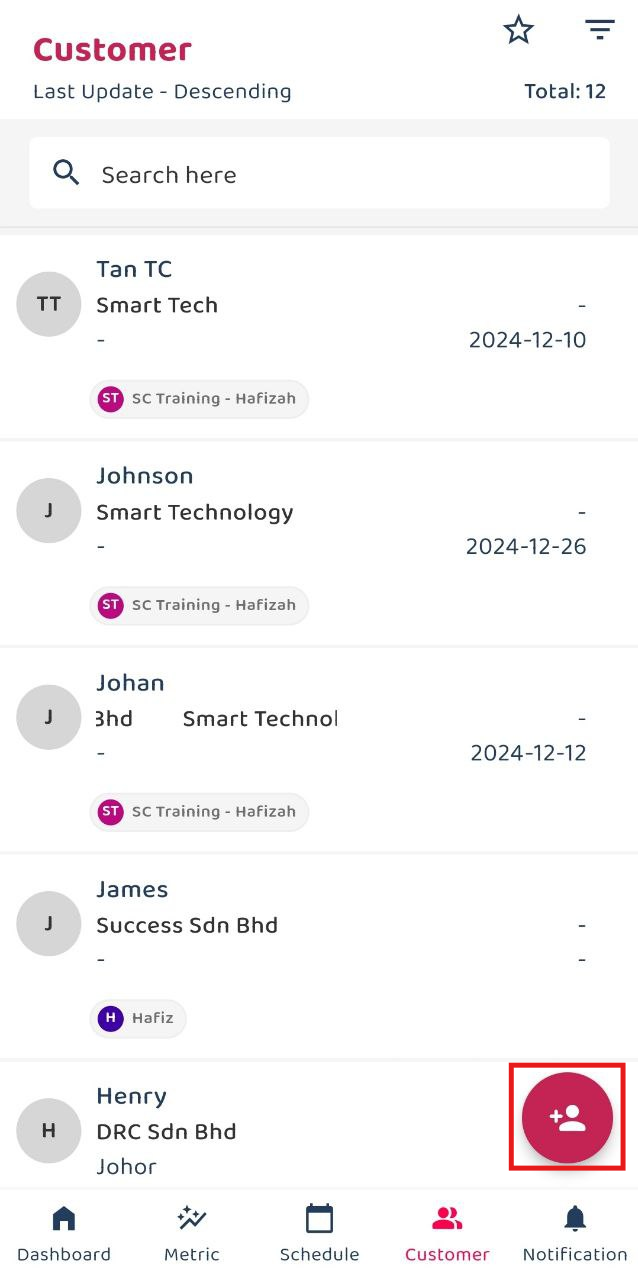
-
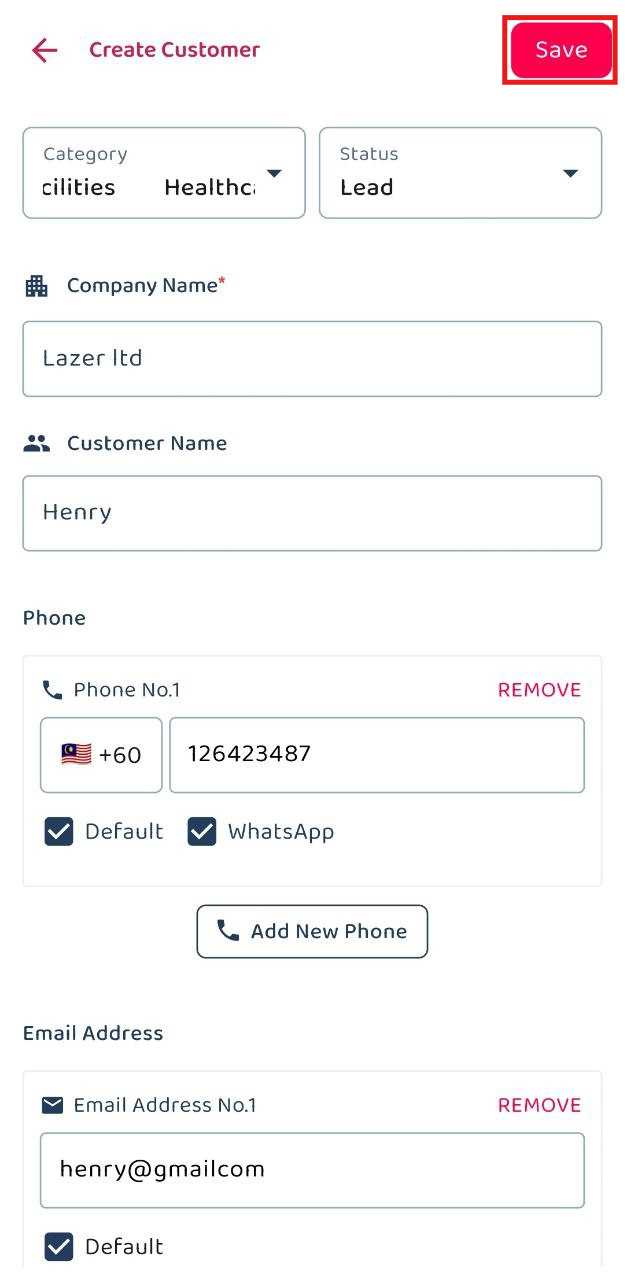
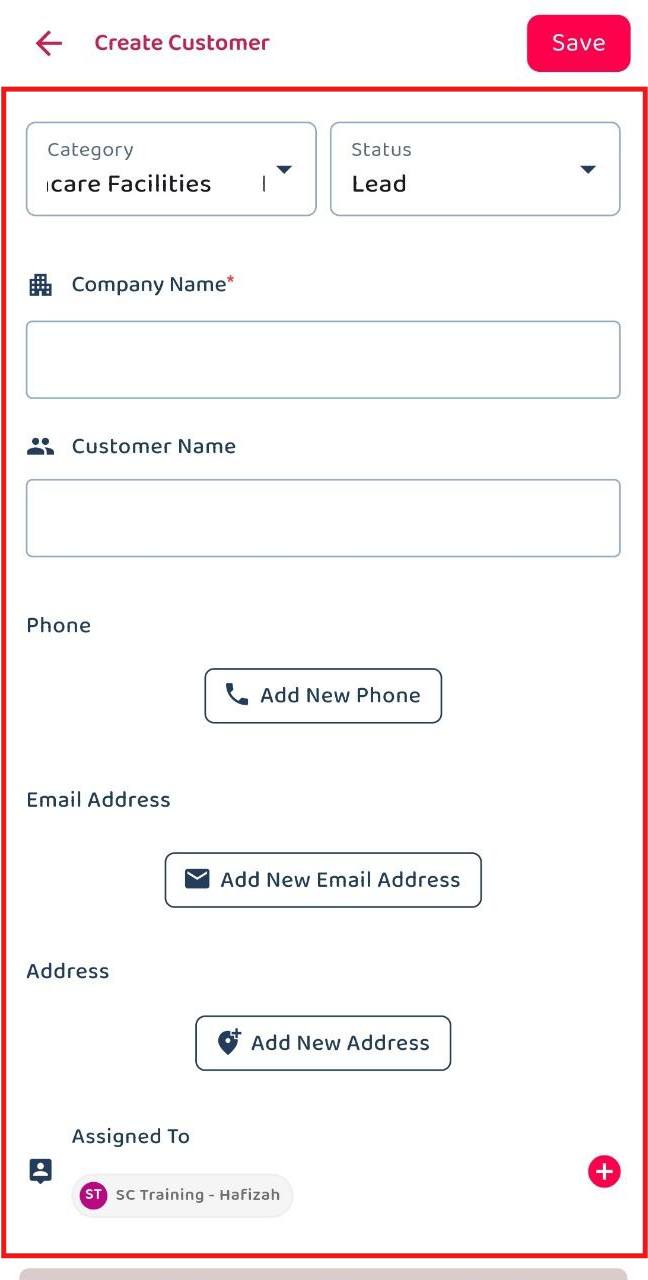
Fill out the details of the new Customer. Available fields may differ depending on your company’s system setup.
Field Name Description Category* Classifies the customer based on their type. Status* Indicates the current status of the customer. Company Name* The official name of the customer’s company. Customer Name The full name of the customer contact person. Phone The customer’s contact phone number. Email Address The customer’s email address. Address The physical address of the customer. Assigned User The user responsible for managing this customer. Asset Any asset registered in the system associated with the customer. *Note: Fields marked with an asterisk ( * ) are required.

-
Click on the “Save” button to save the customer.
-
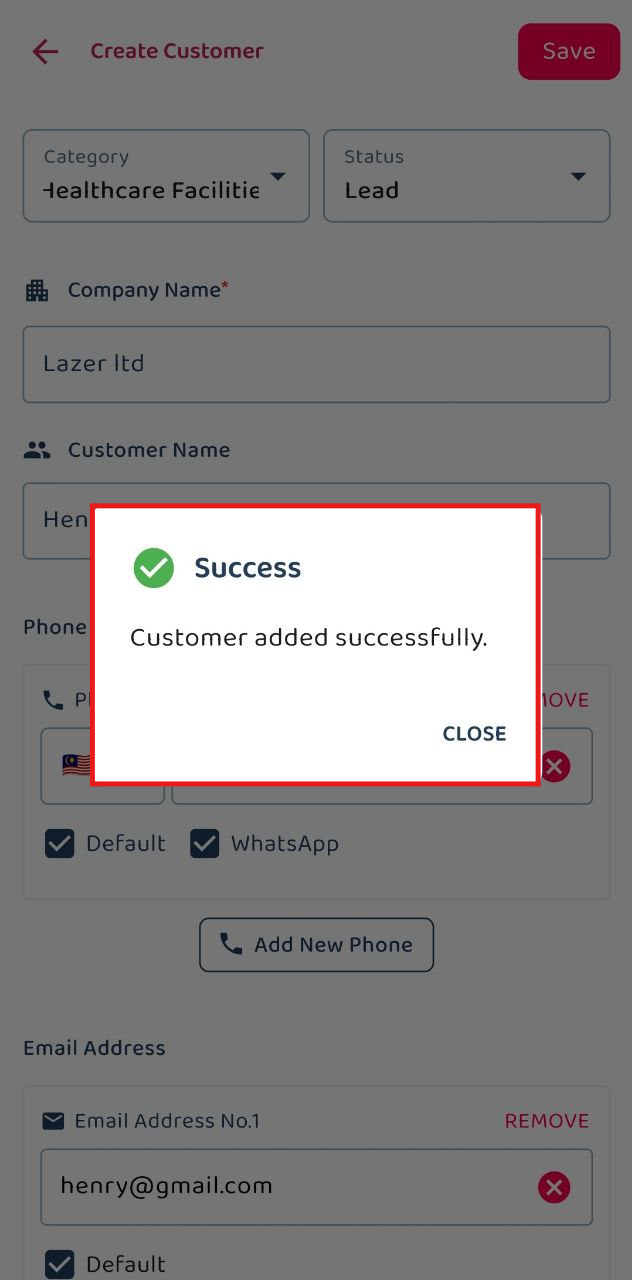
The new customer is added successfully when this prompt appears.

From Job Creation Page
-
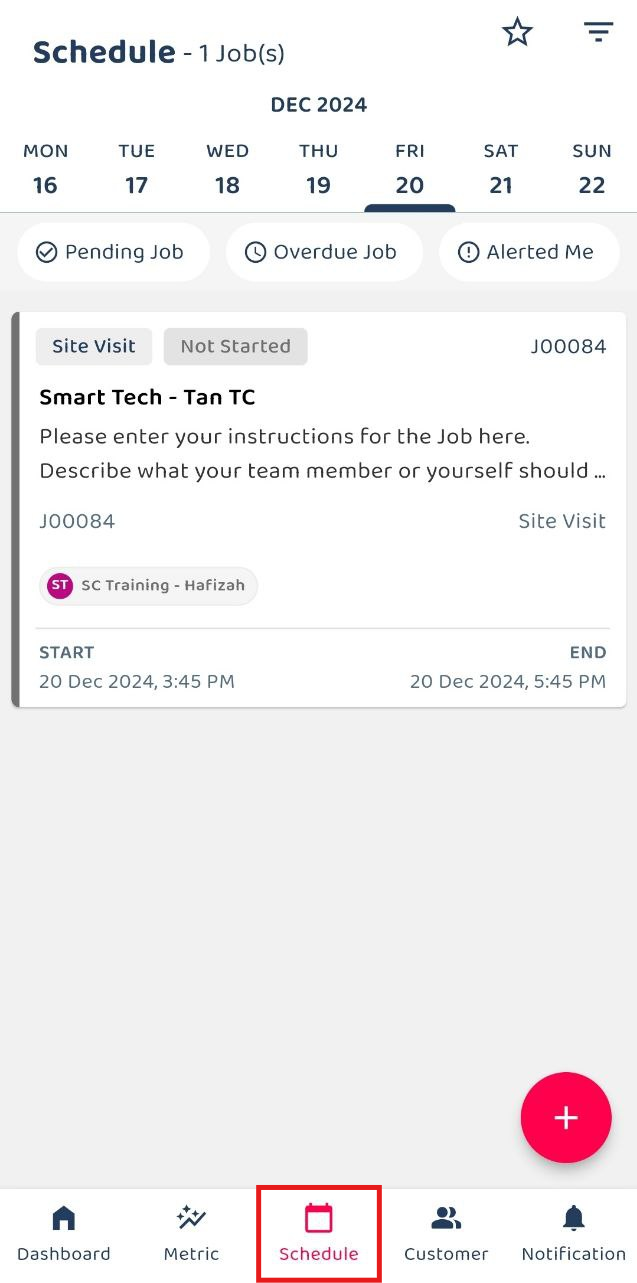
At the mobile app’s navigation bar, go to Schedule.
-
Click on the “+” button to create new job.
*Note: If you do not see the “+” button, you may need to request permission or help from your Admin to register new job.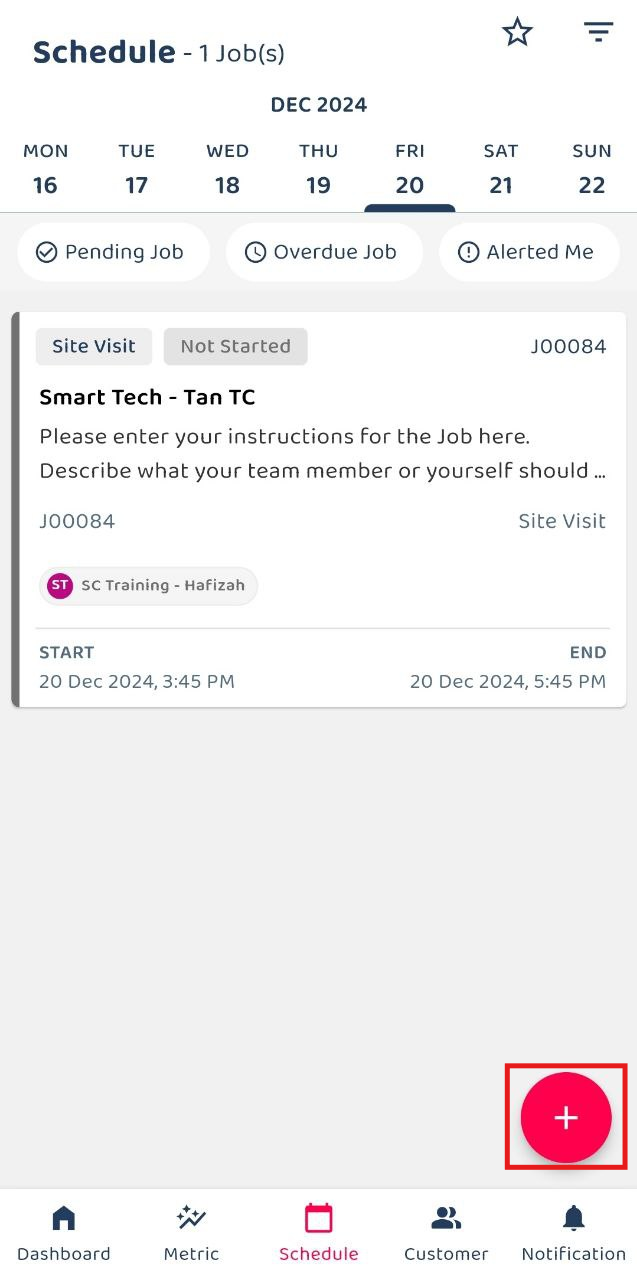
-
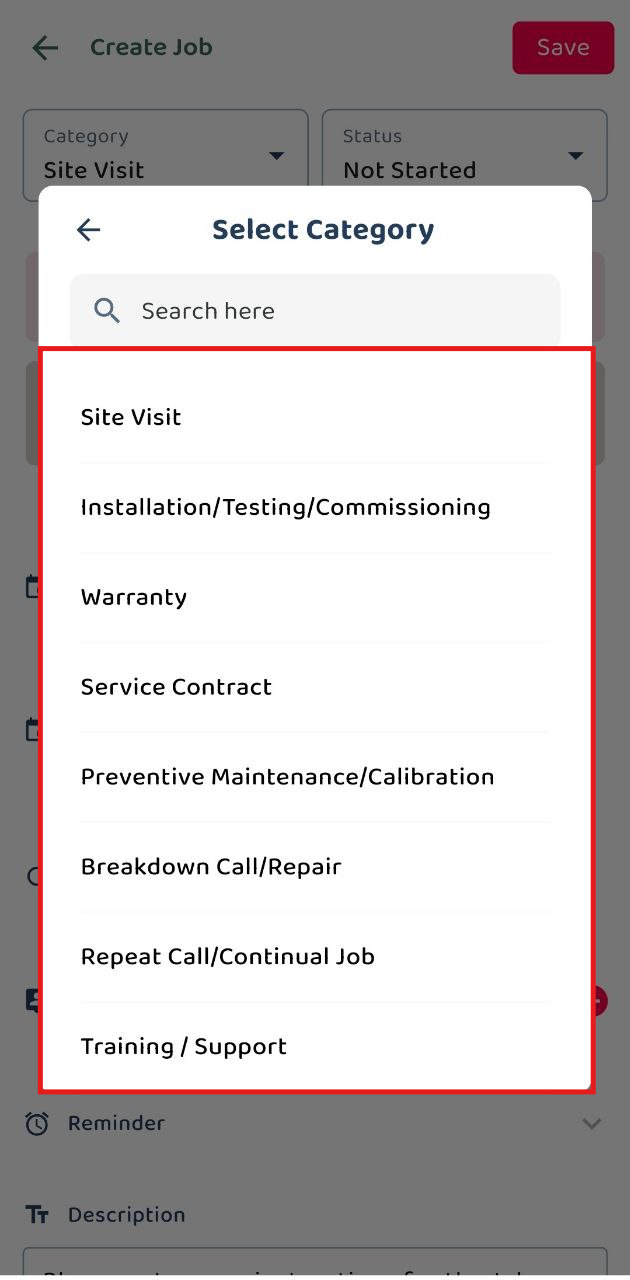
Select the job category.
-
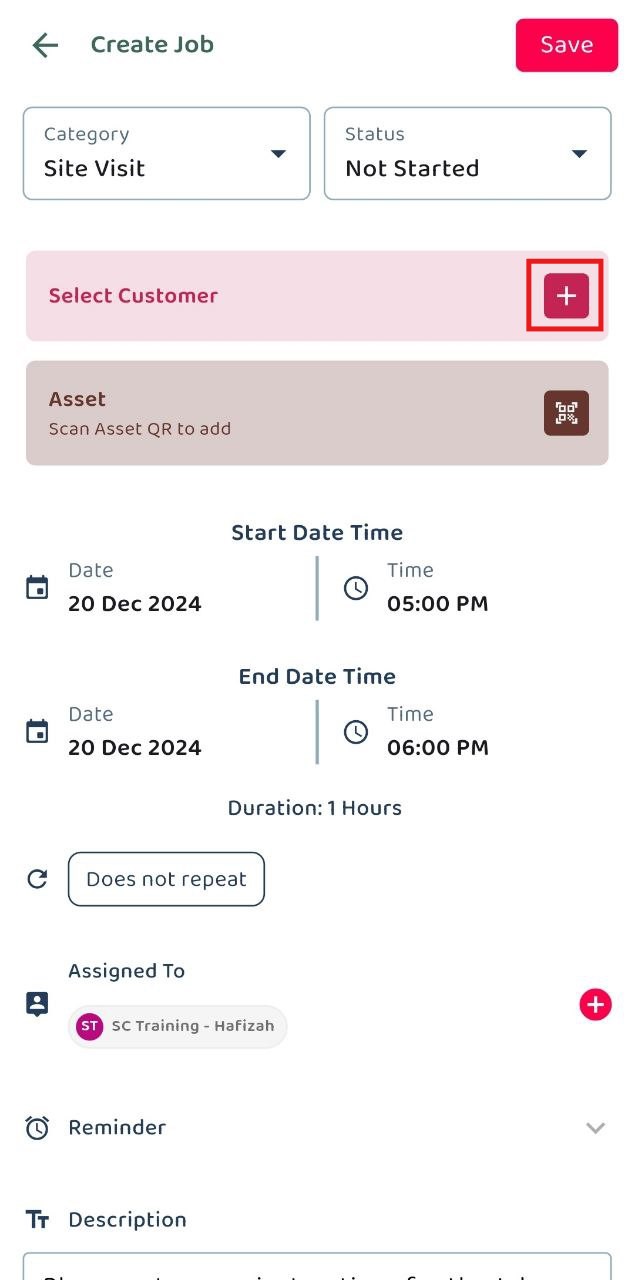
Click on the “+” button to select customer for the job.
-
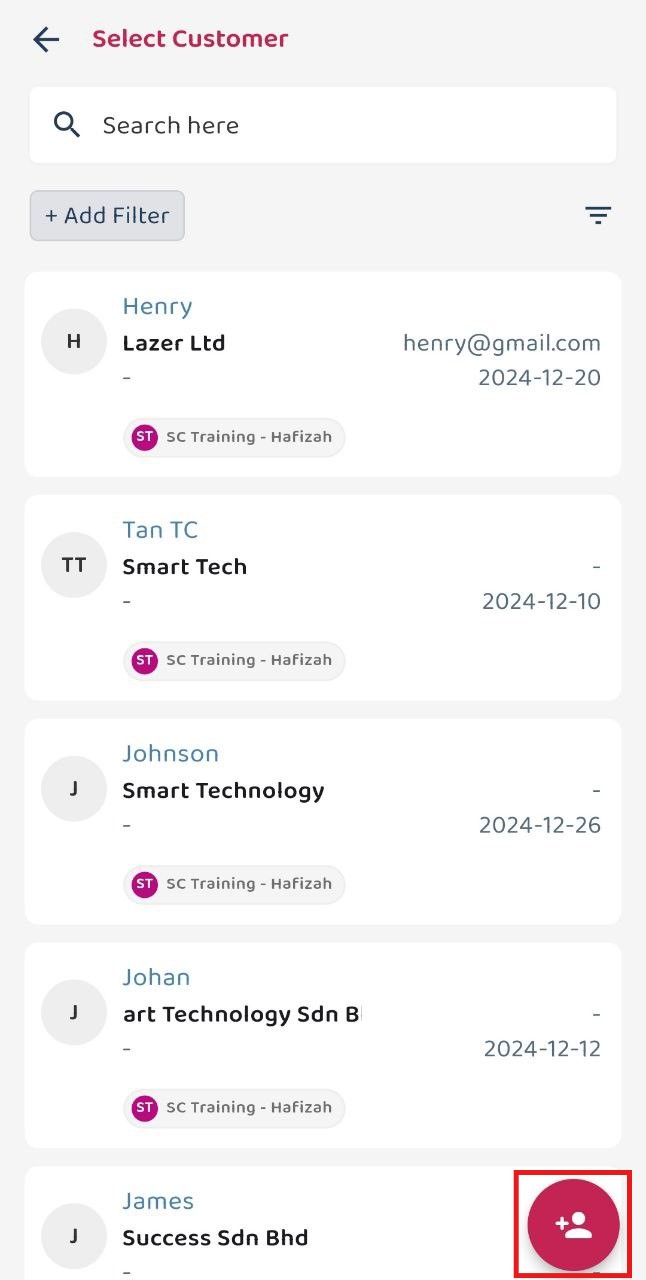
Click “+” to add new customer.
-
Fill out the details of the new Customer. Available fields may differ depending on your company’s system setup.
Field Name Description Category* Classifies the customer based on their type. Status* Indicates the current status of the customer. Company Name* The official name of the customer’s company. Customer Name The full name of the customer contact person. Phone The customer’s contact phone number. Email Address The customer’s email address. Address The physical address of the customer. Assigned User The user responsible for managing this customer. Asset Any asset registered in the system associated with the customer. *Note: Fields marked with an asterisk ( * ) are required.
-
Click on the “Save” button to save the customer.

-
The new customer is added successfully when this prompt appears. You may continue with creating a new Job
Related Articles