 Help Center
What Are Assets?
In Caction, Assets refer to the equipment or items related to the services your company provides — especially important in the service and maintenance industry.
Depending on how your system is customized, Assets might appear under different names or categories such as Lift, Escalator, Machine, Equipment, Printer, Aircond, and more.
Assets can be attached to multiple parts of the system, including:
-
Customers
-
Projects
-
Jobs
-
Digital Forms
-
Public Forms
For example, you will create an asset and attach it to the job so that your team can easily track and manage the equipment they service. Assets can also be included as part of your Job To-Do List, helping your field staff stay organized and ensure nothing is missed during a service visit.
Benefits :
- Easily monitor all equipment you service or maintain in one centralized system.
- Build a complete service history for each asset over time for better troubleshooting.
- Attach assets to jobs so technicians know exactly what equipment they're servicing.
- Keep track of all equipment across multiple customer sites.
This guide will walk you through step-by-step instructions on how to add a new Asset.
Navigate to the section by clicking it.
From Job Creation Page
Using Desktop
-
Go to desktop site “Main Navigation” > “Business Management” > “Schedule” > “Job Schedule”.
Open Job Schedule Page here: https://system.caction.com/activity/scheduler
-
Click the “+” button to create new Job.
*Note: If you do not see a “+” button, you may need to request permission or help from your Admin to register new Job.
-
Select the Job Category.

-
Click on the “SAVE” button.

-
Click the “+” button.

-
Click “+ Add Asset” to add new asset.

-
Fill out the details of the new Asset. Available fields may differ depending on your company’s system setup.
Term Definition Category Indicates the type of asset Status Indicates Current status of the asset Warranty Start Date The date when the warranty period for the asset begins Warranty End Date The date when the warranty period for the asset ends Serial No* Unique code assigned to the asset by the manufacturer Model Specific model code of the asset *Note: Fields marked with an asterisk ( * ) are required.

-
Click on the “Save” button.

-
Click “OK” to confirm your save and your asset is successfully saved. You may continue with creating new Job.

Using Mobile
-
At the mobile app’s navigation bar, go to “Schedule”.

-
Click the “+” button to create new Job.
*Note: If you do not see a “+” button, you may need to request permission or help from your Admin to register new Job.
-
Select the Job Category.

-
Click the “+” button for asset.

-
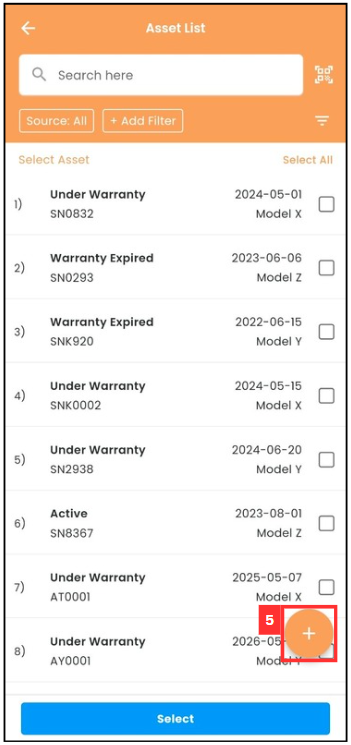
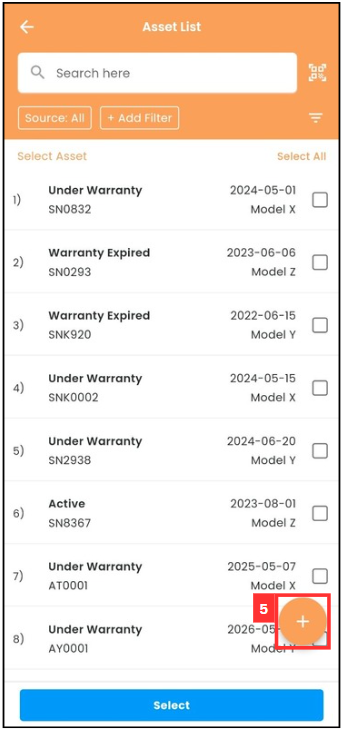
Click the “+” button.
-
Select the asset category.

-
Fill out the details of the new Asset. Available fields may differ depending on your company’s system setup.
Term Definition Category Indicates the type of asset Status Indicates Current status of the asset Warranty Start Date The date when the warranty period for the asset begins Warranty End Date The date when the warranty period for the asset ends Serial No* Unique code assigned to the asset by the manufacturer Model Specific model code of the asset *Note: Fields marked with an asterisk ( * ) are required.

-
Make sure the details is accurate and Click the “save” icon.

-
The new asset is saved successfully when this prompt appears. You may continue with creating new Job.

From Customer List
Using Desktop
-
Go to desktop site “Main Navigation” > “Business Management” > “Customer List”.
Open Customer List Page here: https://system.caction.com/customers
-
Click the “+” button to create new Customer.
*Note: If you do not see a “+” button, you may need to request permission or help from your Admin to register new Customer.
-
Click “Asset”.

-
Click “+ Add Asset” to add new asset.

-
Fill out the details of the new Asset. Available fields may differ depending on your company’s system setup.
Term Definition Category Indicates the type of asset Status Indicates Current status of the asset Warranty Start Date The date when the warranty period for the asset begins Warranty End Date The date when the warranty period for the asset ends Serial No* Unique code assigned to the asset by the manufacturer Model Specific model code of the asset *Note: Fields marked with an asterisk ( * ) are required.

-
Click on the “Save” button.

-
Click “OK” to confirm your save.

-
Your Asset is successfully saved when the “Successfully Saved” prompt appears. You may continue with creating new Customer.

Using Mobile
-
At the mobile app’s navigation bar, go to “Dashboard”.

-
Click the “Customer”.
*Note: If you do not see a “+” button, you may need to request permission or help from your Admin to register new Job.
-
Click on the “+” button to add new customer.

-
Click the “+” button for asset.

-
Click the “+” button.
-
Select the asset category.

-
Fill out the details of the new Asset. Available fields may differ depending on your company’s system setup.
Term Definition Category Indicates the type of asset Status Indicates Current status of the asset Warranty Start Date The date when the warranty period for the asset begins Warranty End Date The date when the warranty period for the asset ends Serial No* Unique code assigned to the asset by the manufacturer Model Specific model code of the asset *Note: Fields marked with an asterisk ( * ) are required.
-
Make sure the details is accurate then Click the “save”button.

-
The new asset is saved successfully when this prompt appears. You may continue with creating new Customer.

Related Articles